
iPhone App Development - Picker Views
What is it?
Swift is the current language for creating iPhone applications. It works within Apple's Interactive Development Environment (IDE) XCode. It is a combination of visual and programming interfaces.
Why should I learn it?
The world is mobile. While many content applications can function on phone browsers, there are some applications, like games, social media and ecommerce, that need native functionality.
What can I do with it?
You can create the visual interface as well as add code to represent functionality of your application using Swift and XCode. Then you can test and upload to Apple's App Store.
How long will it take?
Learning application development is a different and bit more difficult than creating websites. These tutorials will take several weeks to go through to explain the basic functionality available for application development. But with time and practice, you can master the skills necessary to create functional applications. Beyond iPhone development, there is native Android development and cross-platform options like React Native to consider.
Resources
Using Picker Views
Another method of user input is to use one of the PickerView components. This is like a dropdown, giving the user a chance to select something by spinning the picker selections.
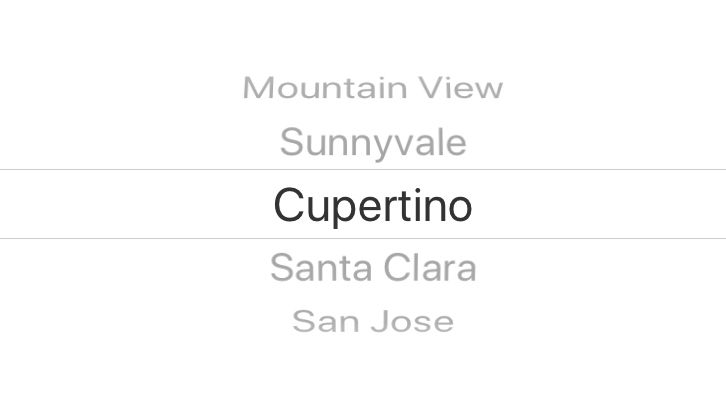
A Picker View requires you to provide selections for the user. Start with a new Xcode Project, Single View App. (File, New, Project, Single View App, make sure you choose Language: Swift & User Interface: Storyboard) In this Project, drag a Picker View from the Library to the Storyboard and position it where you want it to display. Notice the default selections they provide (Silicon Valley cities). We will provide our own.
Connect the Picker View to the code as an Outlet, name it "picker". If you need to open the code, use Option and then click on the ViewController file in Project Navigator.
Create a label, connect to code as an outlet, name it "selectedLabel". Stretch it out so it will be able to display the answer.
See the the first code block to the right. Create an array to hold your selections. I have named this one "items", but you can name it anything you want, as long as you use that name appropriately later in the code. Include this in the ViewController where you initialize variables. I have called selections Item 1, etc, so feel free to put anything you want as your selections.
Let’s also create a variable to hold the selection, so you can evaluate it. In this case, the selections in the array are strings. Copy the line of code into the View Controller to initialize the selection variable. You should include any other labels you need, like a page heading or the question that goes with this Picker.
Pay careful attention to the comments for where to include the code in the following steps. Modify your view controller class declaration to look like the code to the right to include the delegate and data source features. This will introduce errors that we will fix.
Include the delegate and dataSource lines to the right in the viewDidLoad function:
Picker Setup
Picker Functions
Now we will insert the code that controls the Picker. From the code block to the right, copy the four picker-related functions into the code. These functions tell the picker the number of columns (you can have more than 1), the number of items (items.count), which row to return and how to update the selectedLabel text.
The final statement indicates what happens when a row in the Picker is selected. In this case, it puts the item in the selection variable and changes the text for selectedLabel. Test the app to see it function as it changes the label to the Picker selection.
You can then perform different logic functions on this item with "if statements" to determine if the person selected the correct answer. You could also include a variable that increments a score or other technique, now that you have an answer from the user. You can also include a button that segues to another scene and/or provides the response.
Picker Functions
Passing Picker Data
If you want to pass this result back to a main view controller, set up a New ViewController as the Initial View Controller with a correspinding new File (Cocoa Touch Class). See the previous lesson on Passing Data. Create buttons to segue to the ViewController with the Picker and back. See the code block to the right for the code to include in the didSelectRow function.
In the initial View Controller, include the line for your Global class declaration and include a label called myPicker as an Outlet to receive the Picker Value. In the viewDidLoad function, add the line to change the Label text to display the picker selection.
Remember, if you choose to use an Embedded Navigation Controller for your Back button, the function to use is viewWillAppear, instead of viewDidLoad (viewDidLoad is not invoked by the Navigation Controller).
Test the app to make sure your segues and selections execute properly. This is just a brief example of how you can implement a Picker View. Be creative in how you use it in your own projects.
Passing Value from Picker
Navigate with Picker
We can navigate to other View Controllers via a Picker, instead of button navigation that we have used previously. Add new View Controllers to your Storyboard (I made a green VC and a blue VC for this example). On the main ViewController, from the ViewController button at the top, create segues to each (drag from button to the View Controller and choose Show). Select each segue and give it a unique Identifier in the Attributes Inspector. In this example, I created two View Controllers, one with segue named GreenSegue and one named Blue Segue.
Make sure you have all the picker functions as defined above. Create a button and connect as an Action to be selected to execute the segues (preferred). Or in the DidSelectRow function, use if statements to perform the named segue for each index number. See the code.
You can Embed a Navigation Controller to assist with the Back navigation to the initial View Controller with the Picker. Obviously, if you are going to do anything programmatically on the additional VCs, you will need to create and attach new .swift files as shown in the Passing Variables Tutorial.
Date Picker
There is also a Date Picker in the Library that allows you to work with date selections.
Find a Date Picker in the library and drag it onto the Storyboard in a new project. Size and align it as necessary. In the Attributes Inspector, you can choose the Mode from the Attributes Inspector that allows you to pick Date and Time, Date only, Time only or Countdown Timer. Use any other Attributes to get it to look the way you want it to look.
Let’s assume for this exercise that you are using the Date-only mode. Ctrl-drag from the Date Picker in to the code and set it up as UIDatePicker, Outlet, with the name datePicker.
Now also set it up as an Action named dateChanged. In that function, include the code to the right to initialize the date variable.
This line gets the date from the datePicker. To see what has been selected, let’s create a label that will hold the date. Drag a label to the Storyboard and connect it to the code as an Outlet named dateLabel. Drag it to a wide size, so we can see the entire date when the picker changes.
Then in the dateChanged function, include the code to change the text of the dateLabel.
Test the app. That is the complete date that was selected. It is presented in a date format, so you have to escape it in a string to see it in the text of the label. It is in a strange format that is probably not that useful,though. You can format dates by establishing a DateFormatter and then saving the results in constants, depending on what you want. Create a second label as an Outlet named formattedLabel to hold this value.
Change the code in the dateChanged function to that of the second code block to establish the date format and use that Date Formatter as the formattedLabel text.
Since this is now cast as a string, you don’t need to escape it in a string, but it is a good idea to do that, especially if you want to concatenate other text. Other dateStyles are .short and .medium. Change that in the code and test to see how the date style changes. Compare the date in the second label to the unformatted version in the first label you created.
Simple Date
Formatted Date
Doing Math with Dates
You can also convert dates to integers and use them in equations. Create one more label as an Outlet named daysTo (you should stretch it out and use 0 for number of lines, so it will fill the area properly). To get today’s date in the original function, include this code at the top of the dateChanged function.
This gets today’s date and converts it to seconds. You can either use timeIntervalSinceReferenceDate or timeIntervalSince1970 as your method to establish the integer.
We can also convert the picker date to an integer. Put this after the date variable declaration.
Then to report the number days since or until, you do a simple calculation to report into your dateLabel.
This will give you the number of full days until or since the picker date. See the full code for the dateChanged function to the right for these calculations.
Dates can be confusing, so focus on what you are doing and create constants that can hold your desired date formats.
Moving On
Take your time with these techniques. They will help you achieve more professional and responsive designs! You know how several ways to get inputs from users. Next we'll look at connecting your app to a cloud-based database.