
iPhone App Development with XCode and Swift
What is it?
Swift is the current language for creating iPhone applications. It works within Apple's Interactive Development Environment (IDE) XCode. It is a combination of visual and programming interfaces.
Why should I learn it?
The world is mobile. While many content applications can function on phone browsers, there are some applications, like games, social media and ecommerce, that need native functionality.
What can I do with it?
You can create the visual interface as well as add code to represent functionality of your application using Swift and XCode. Then you can test and upload to Apple's App Store.
How long will it take?
Learning application development is a different and bit more difficult than creating websites. These tutorials will take several weeks to go through to explain the basic functionality available for application development. But with time and practice, you can master the skills necessary to create functional applications. Beyond iPhone development, there is native Android development and cross-platform options like React Native to consider.
Getting Started
During these exercises, you will be introduced to some of the basics of mobile application development. After this session, you won’t know everything, but you will be able to continue to practice and learn, and hopefully get started on your own application projects.
When making a native application for a mobile device, you are using either the iOS or Android platforms. iOS apps use Swift (previously Objective-C) as the language and the XCode platform. Android apps are typically made in Java with Google’s own interactive development environment. And there are platforms like PhoneGap and React Native that create cross-platform solutions.
We will be making several iOS apps, using Swift and XCode.
Setting Up Development Environment
- iOS 17 – we’ll be developing for the current version
- XCode - if you have a Mac, download it from the App Store. Our computers already have it. It will then be found in your Applications folder. We are using XCode 15 at the time of setting up this lesson.
- Swift 5.9 is the current version of Swift. We will be using this version, but you can change the version you are developing in the Build Settings (click on the top project folder name in the Project Navigator window).
- In XCode Welcome screen, you can open a project, start a new one or open a playground.
Opening XCode
In XCode Welcome screen, you can open a project, start a new one or open a playground.
Playing in a Playground
We’ll use a playground to review some of the programming techniques you learned in the online modules. In XCode, choose File, New, Playground. You can leave the name MyPlayground. Choose Blank. We will use this to get some experience with Swift programming techniques. One by one, we’ll type in the lines of code to the right into the playground and click the play button.
Notes for naming variables:
- Names can't contain mathematical symbols.
- Names can't contain spaces.
- Names can't begin with a number.
Camelcase – you will often see this in some styles of programming, where the first letter of a name of something is lowercase, but other first letters are capitalized. You can decide what style is best for you, but there are some accepted standards.
Comments - Use comments to ignore lines of code //
Types - String, Int, Double, Bool
Code Sample - Playground
Creating a New Project
Now that you have some experience with Swift programming in the playground, you are ready to start a project.
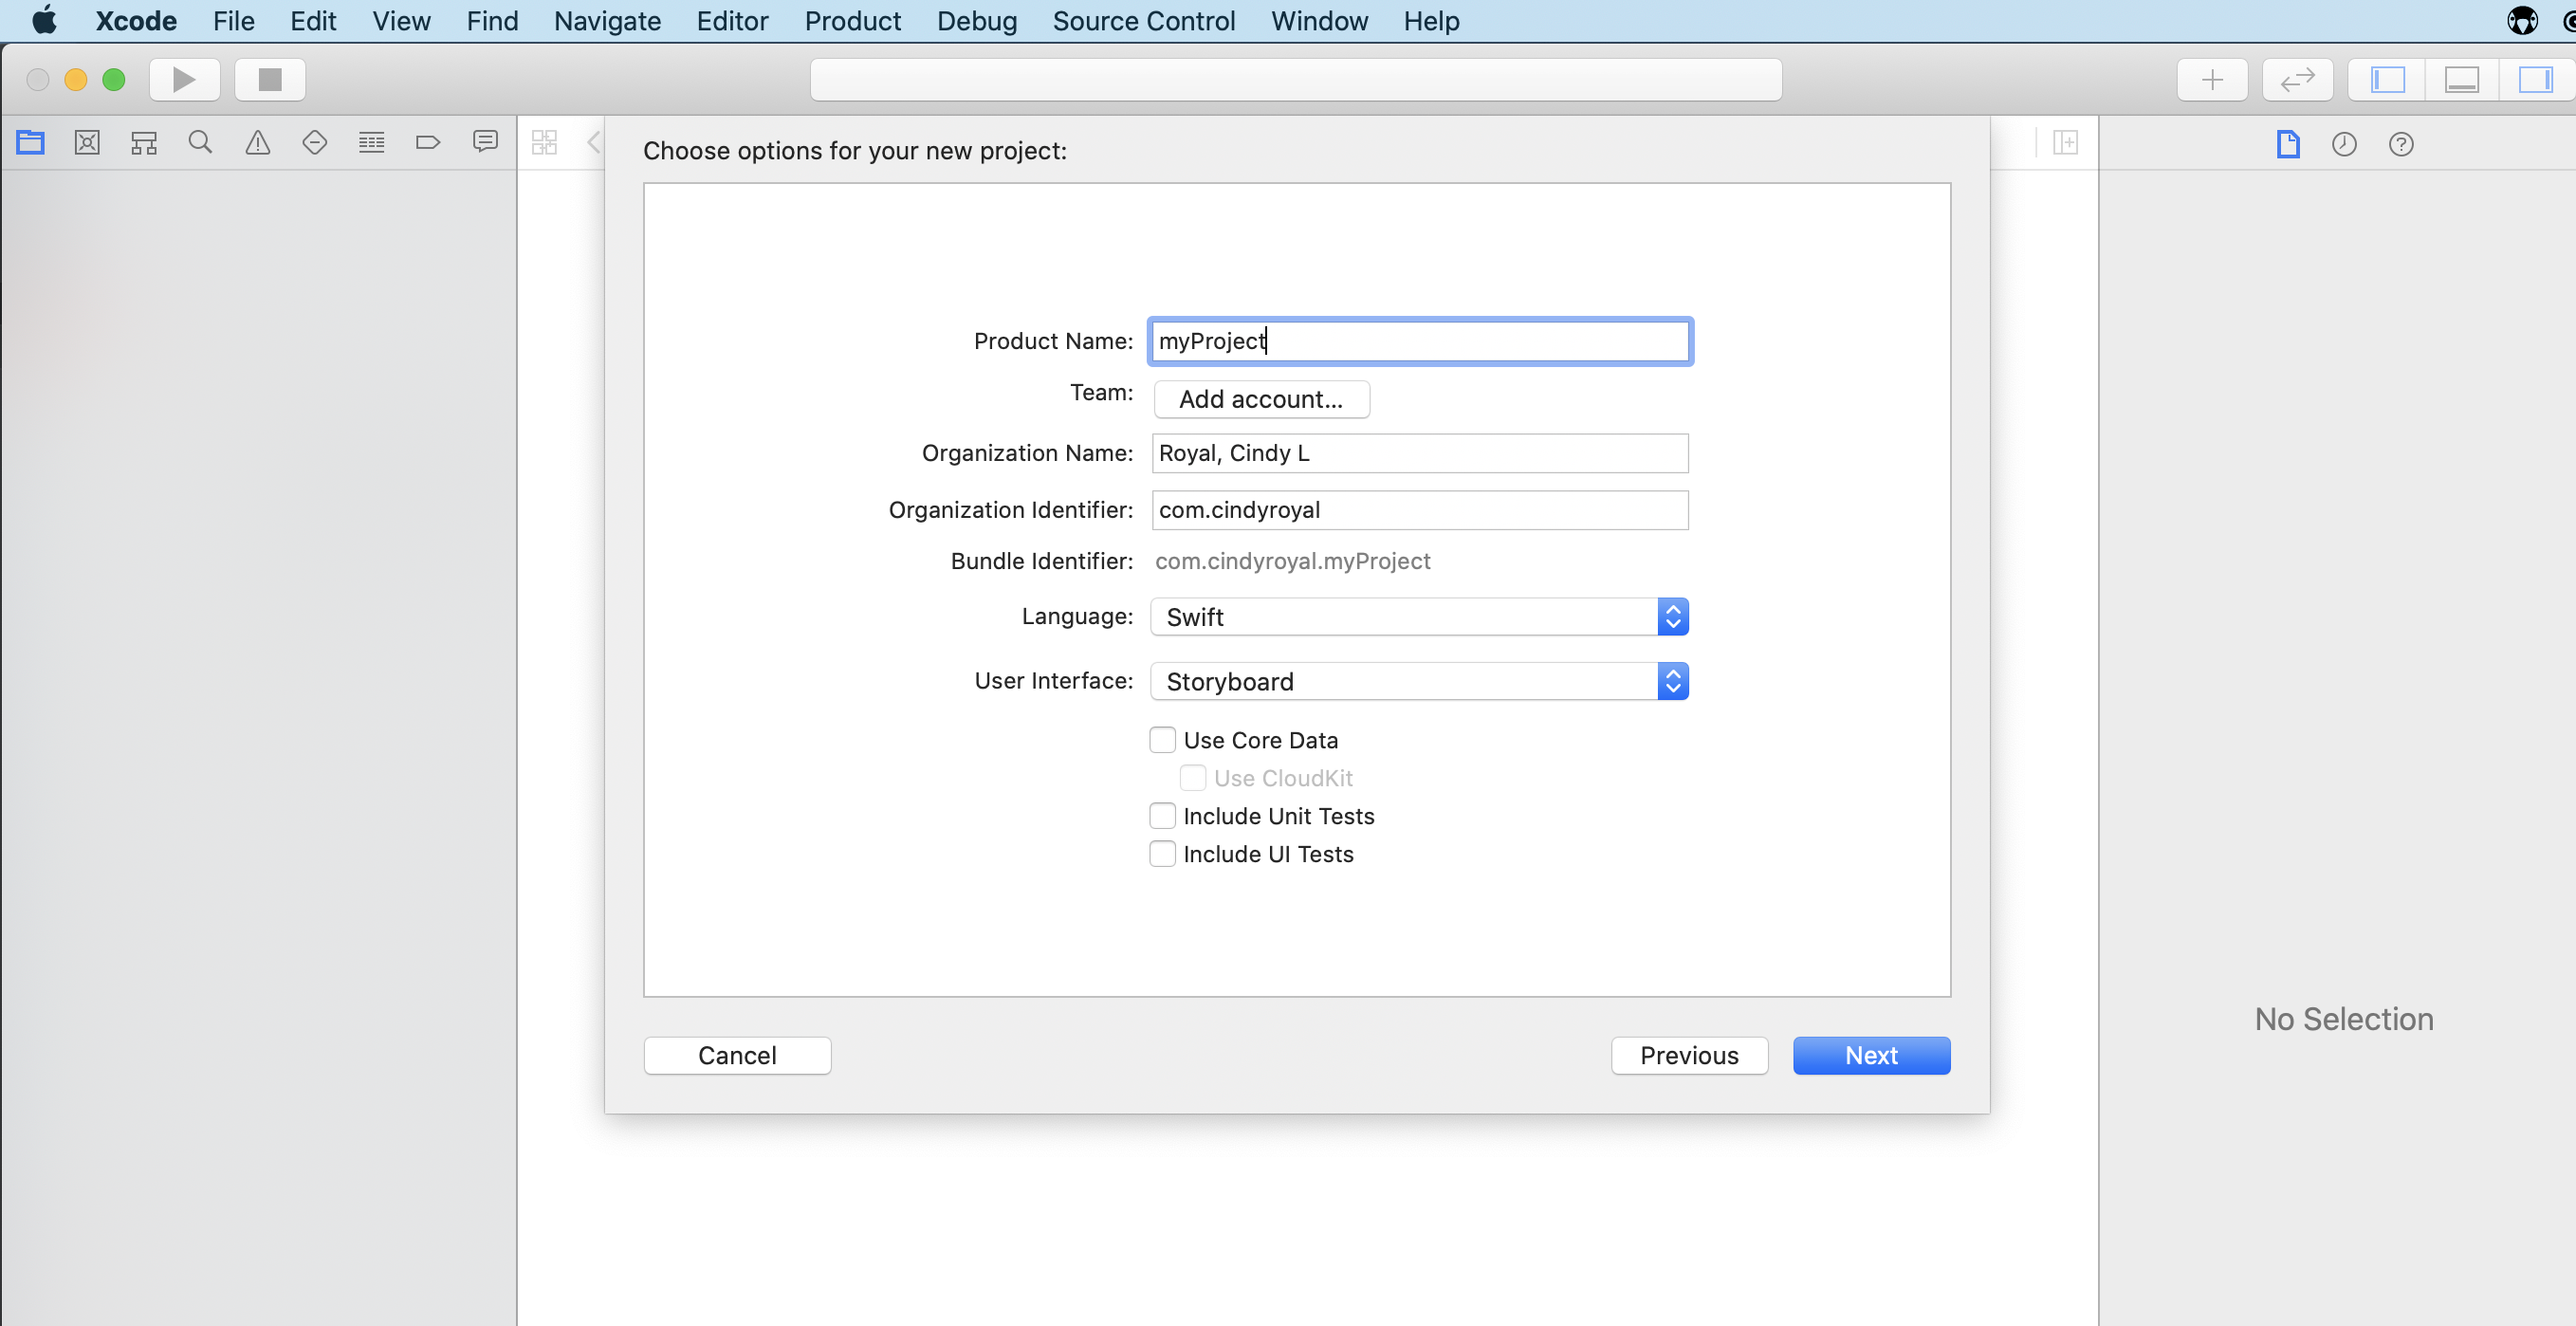
- Select File, New Project for an iOS project and choose an iOS App. Choose Next.
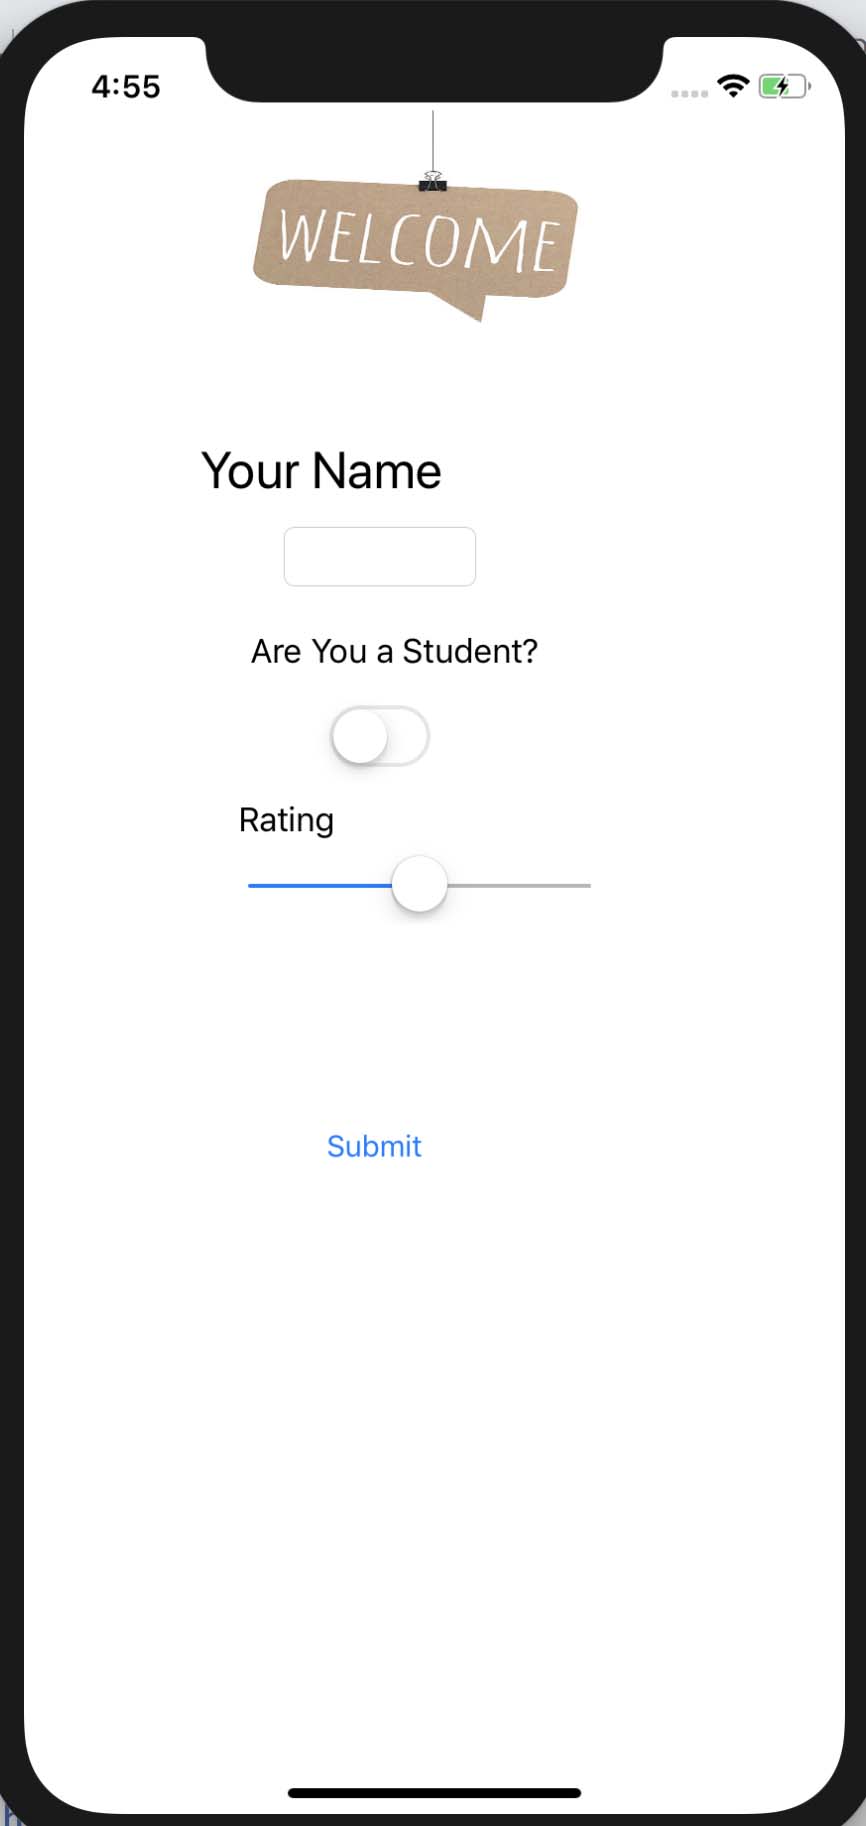
- Give the Project a name. Best to not include spaces, as XCode will fill them with a dash. For this one, call it MyFirstApp.
- For Organizer Identifier, use a reverse domain name, like com.cindyroyal. This provides a unique identifier and goes from most general to specific (opposite of regular urls). Just needs to be unique so when you upload to App Store, you are uniquely identified. So just include com.yourname.
- Choose Swift as the Language. iOS apps were previously made in Objective C, but Apple introduced Swift in 2014. It is considered a more user friendly language, more like English than Objective C. It employs modern programming-language theory and concepts and strives to present a simpler syntax. For the User Interface, Choose Storyboard. We will discuss the SwiftUI option later in the course.
- Save anywhere you want on computer, but be sure to remember where you saved it. Desktop or Documents is fine.
XCode Interface
Once you are in the XCode interface, it might seem a bit confusing. Here is a layout of the sections. You will use each of these sections to perform different functions for your application.
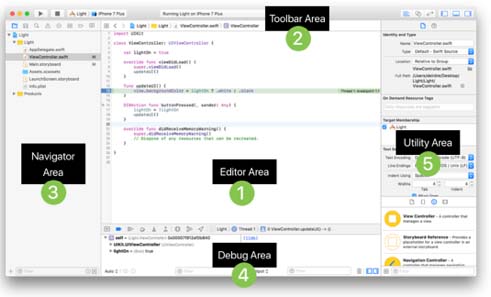
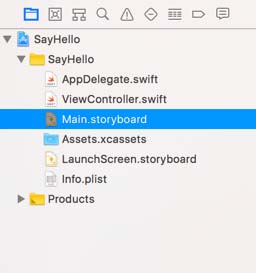
Left - Navigator, different ones. Mostly use Project Navigator. Groups of files.
Center - editor, shows what you have selected in the Project Navigator. Can change project settings. On a code file, you will see the code. Also, storyboard and asset files.
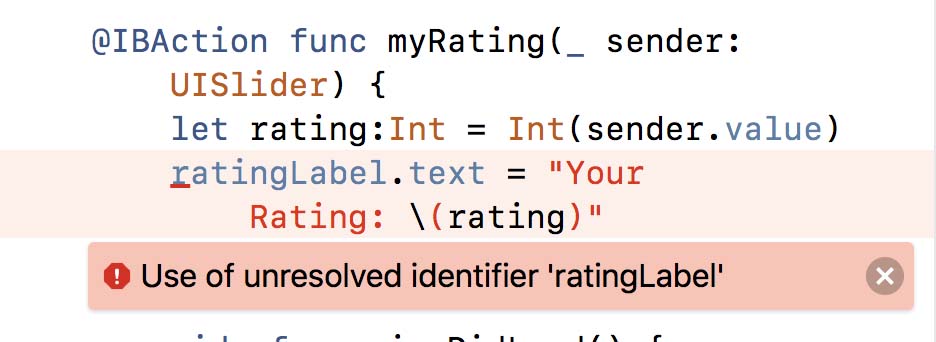
Sometimes you have both code and Storyboards open. When you want to have both open, you can use Option and select the other, so that you see both in the center editor area. You need to have both open when you are making connections between the interface elements and the code.
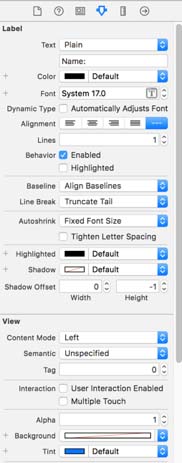
Right - Inspectors and Views - Also on the right of the screen is the area that has several inspectors and views that allow you to change options associated with elements of your app.
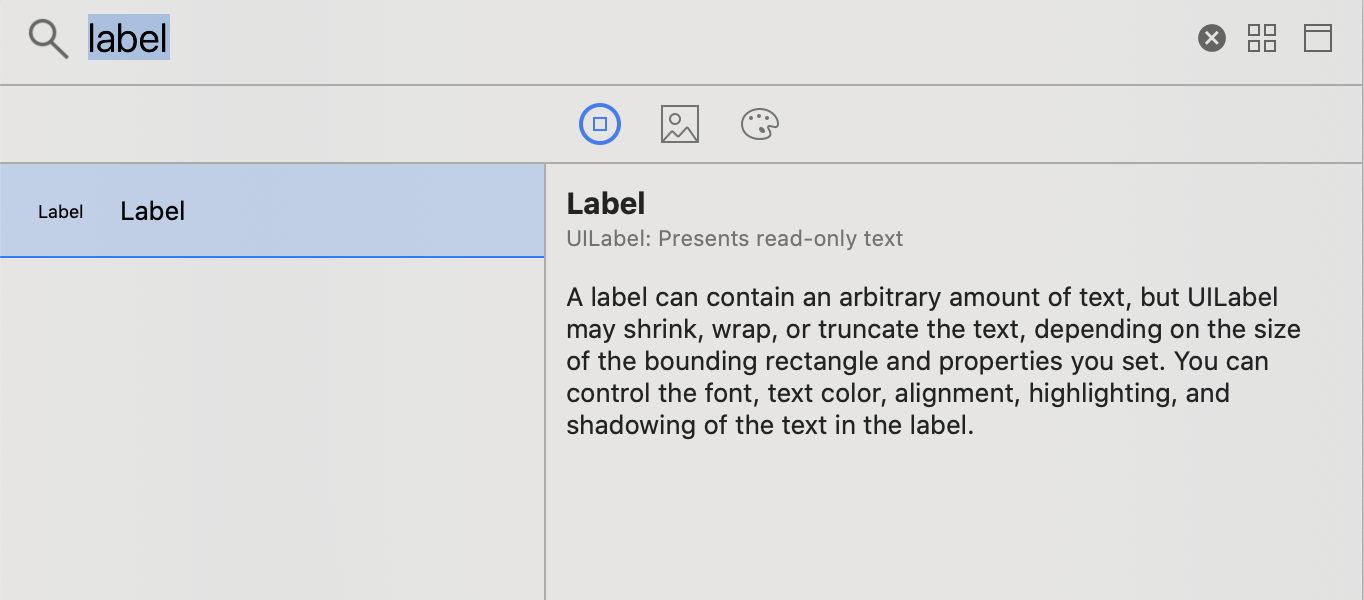
Library Pane - Has user interface elements, code snippets, files templates. The Library pane is now a free floating panel that you can access via the plus sign (+) button near the top right.
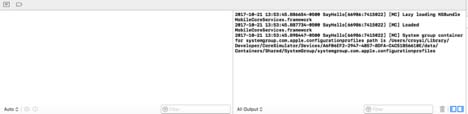
Debug Area - Bottom of center. It shows error messages and allows you to see results of print statements.
Show/Hide windows - All these navigators, inspectors and boxes can make the application seem crowded, so each area has a button to show or hide. Look for these icons:

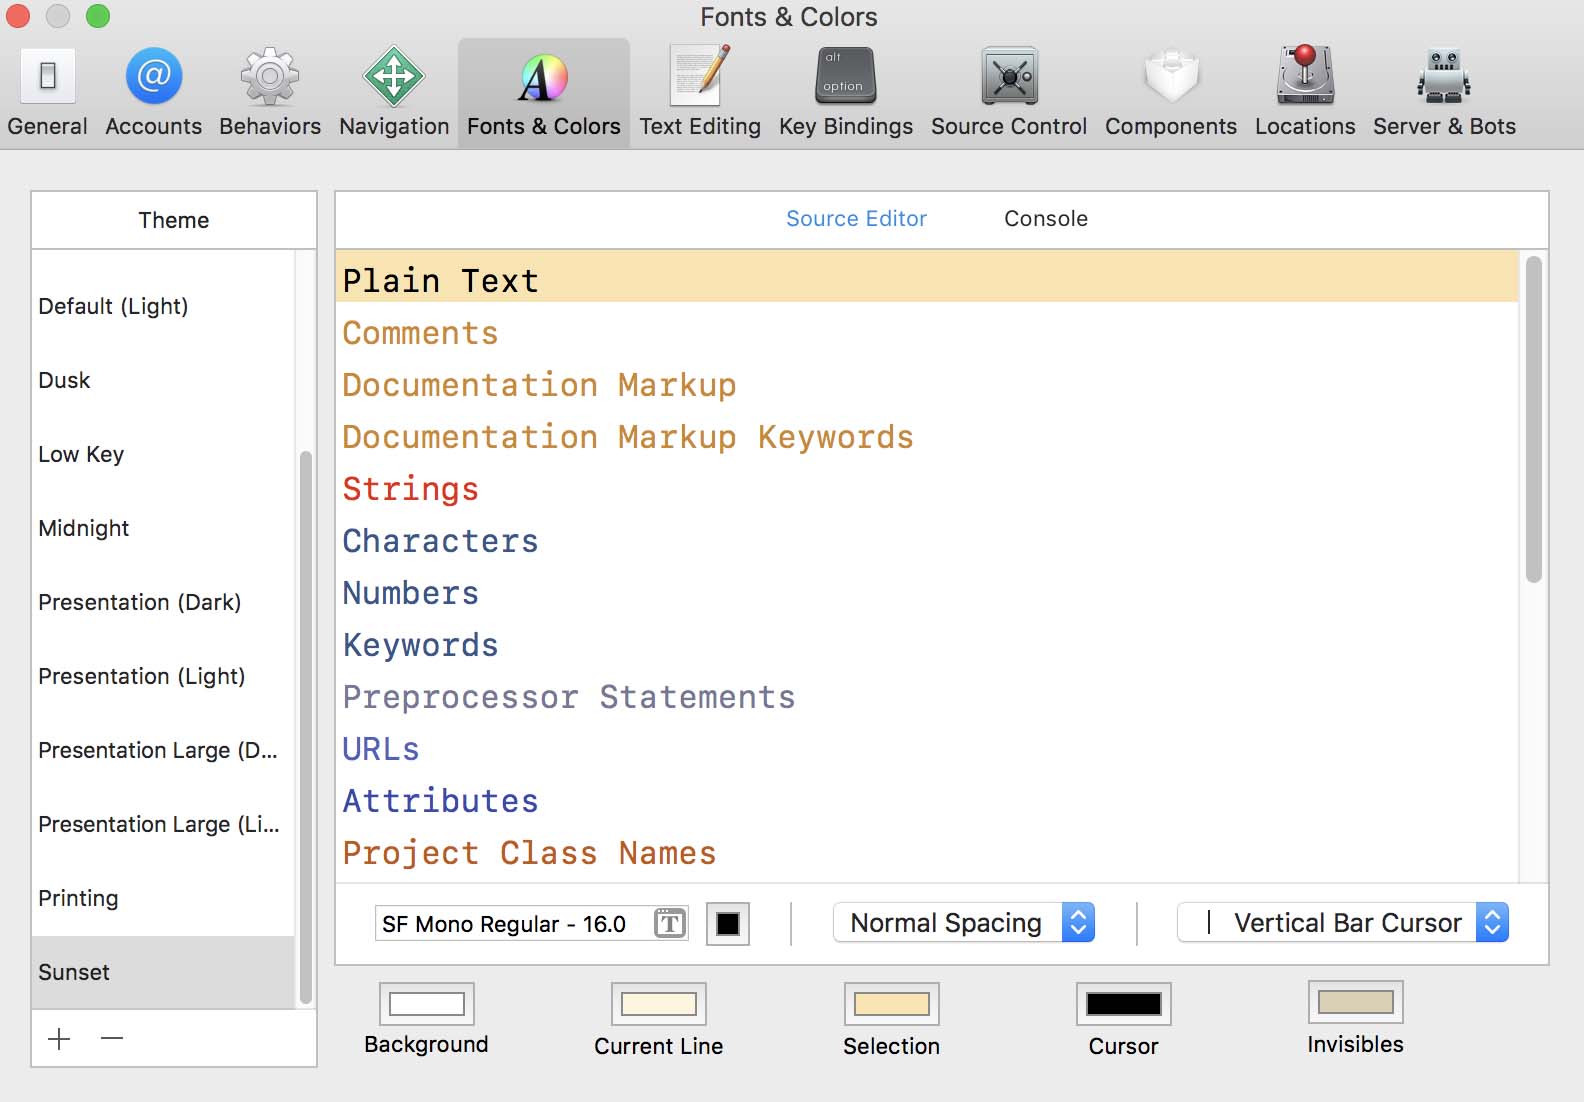
Change XCode Defaults
Xcode, Settings. Choose Themes to change how things look in XCode. Create a custom setting by duplicating default. Click plus button. Choose all the settings and can change font and size.
Text Editing - make sure line numbers is chosen.
Account tab, can use to publish directly to App Store.
Simulator
Toolbar - running and stopping app, choose device, status info and Views.
When you press the run button (triangle in top left of interface), the Simulator is launched to show you what your app looks like and how it works. Change Simulator to the type of phone you want to make your app using the main toolbar. Then choose the Run button. You will see the Simulator and then the app launches. It’s just a blank screen now. It may take a few seconds for the build to display.
If you need to change the size of the device in the Simulator, just click and drag on the edges.

Errors
As you are working on your app, you may (you will!) see icons with exclamation marks in them. They are either warnings (yellow) or errors (red). In some cases, you may have to debug them. We will address as we go. Open the icon and read the message. These error messages will be an important part of debugging and troubleshooting. When you correct an error, wait a second to see if the error icons disappear.
Make sure you click the stop button (square) after each run session.
Moving On
That gets us started. In the next exercise, you'll make your first app!