
iPhone App Development - Messaging App Exercise
What is it?
Swift is the current language for creating iPhone applications. It works within Apple's Interactive Development Environment (IDE) XCode. It is a combination of visual and programming interfaces.
Why should I learn it?
The world is mobile. While many content applications can function on phone browsers, there are some applications, like games, social media and ecommerce, that need native functionality.
What can I do with it?
You can create the visual interface as well as add code to represent functionality of your application using Swift and XCode. Then you can test and upload to Apple's App Store.
How long will it take?
Learning application development is a different and bit more difficult than creating websites. These tutorials will take several weeks to go through to explain the basic functionality available for application development. But with time and practice, you can master the skills necessary to create functional applications. Beyond iPhone development, there is native Android development and cross-platform options like React Native to consider.
Messaging App
Now that you have learned how to create a TableView and read from a database in the cloud, let's work on an exercise that allows users to write to the database. We will set up a simple messaging app.
Go to firebase.google.com and login.
Once you are logged in, you should see your account in the top right with Go To Console next to it. Choose Go To Console.
We will create a simple database to hold messages that come from an app. This example is based on the series of exercises starting with Firebase Tutorials for iOS
This is where you will add projects. Choose Add Project and give it a name. For this project, let’s call it messaging. Accept the terms and click Create Project. You don't need to turn on Google Analytics.
Now we need to get the files to connect to our app (which we will create below). Click on the iOS logo to your iOS App. Give it a bundle id, which should correspond to what you will use in our app (for example com.cindyroyal.messaging) and give the app a nickname. Let's call this messaging. Choose to Save the .plist file on your computer. We will use add this to our XCode project to connect the app to the database. Make sure you are only signed in to one Google account in the browser. This plist file contains all the settings to connect your app to the database.
If you have already created the database, choose the database’s Setting (gear) icon to get back to these settings.
Creating the XCode Project
Create a new XCode Project as a Single View Application. Give it a name that corresponds to the bundle id you created above (messaging). The name will be added to your organization id (ie com.cindyroyal.messaging). Make sure language is Swift and the User Interface is Storyboard and Save.
Drag the GoogleService-Info.plist that you downloaded above and put in in the folder stack for the project. Choose Copy Items If Needed and Finish. This saves a copy of the plist file in your folder. This is the one you will work with now. Make sure the file is named GoogleService-Info.plist in the project. You can change the name in the Project Navigator (if the file that was downloaded had a number on the end because you already had one of that name in Downloads).
Add Firebase SDK Using CocoaPods
We are going to use the dependency manager CocoaPods to add the Firebase SDK to our application. We’ll use the Terminal to install CocoaPods (look in Utitlities). The $ indicates the command prompt, so you do not copy the $ character.
$ sudo gem install cocoapods
You will need to do this on computers where you have administrator password access. This is already installed on our computers, but if you are working on your own computer, you will need to do this. If you already installed CocoaPods in a previous exercise, you don't need to reinstall it. You can check to see if the computer you have has CocoaPods installed with the following command
$ pod -–version
Now that you have confirmed that you have CocoaPods, you will need to change to the folder that has your project. In Terminal, use cd to get into the project folder.
$ cd Desktop
$ cd messaging
This works if your project is on the Desktop in a folder called messaging. Use the cd command to get to the location of your app. Use the ls command in the project folder to see a list of files.
In the messaging folder, run the init command. This initializes the project with a Podfile.
$ pod init
In the Finder on your computer, find the Podfile that was created in the your folder and open the Podfile (ctrl-click) in a text editor (Brackets or Atom or even TextEdit).
Under #pods for messaging, add the following and Save.
pod 'Firebase/Core'
pod 'Firebase/Firestore'
Back in Terminal, run the install command
$ pod install
This reads the podfile and installs the dependencies you need. You will see these items installing in the Terminal and you will see the Podfiles and Pods folder installed when you look in the Finder. These files are unique to your application and should not be shared in public repositories.
Now, in XCode, you will continue working on the app in the xcworkspace file (not the xcproject). So Close the project and reopen it in XCode as the .xcworkspace file. Run the project, just to make sure it builds without any errors.
In XCode, open AppDelegate.swift. Add import Firebase below import UIKit.
import Firebase
In the func application in the didFinishLaunchingWithOptions, above the "return true" statement, add
FirebaseApp.configure()
Now our app is connected to our Firebase database project!
Set Up the Cloud Firestore Database
Now let's create our database. Back in your Firebase project, under Databases, Create Database for Cloud Firestore and start in test mode. This adds the true values below to the rules to prevent authentication requirements. In a real app, you would want to include login credentials to verify users, but we are just testing with our applications. We won’t cover that in this class, but you can work on that later, if you develop an app you want to include in the App Store.
Remove auth for testing in firebase. You will see this under Rules in the Database.
read: true
write: true
Make the iOS app
We are going to make a simple messaging app in a single View Controller. In XCode, go to your Storyboard file. Make sure you are in the .xcworkspace file (not the .xcodeproj file).
From the Library, get a TableView and drag it into the ViewController. Have it start about 1/3 of the way down and then fill up the rest of the screen. Click on the TableView and choose 1 for Prototype Cell in the Attribute Inspector. Choose the TableViewCell and give it an Identifier of "PostCell" in the Attributes Inspector. That is what will be used in the code for the TableView.
Add a TextView to the ViewController. Delete the fake text. You can give it a back ground color so you can see it. You can include a label next to it that says "Subject:". Add a second TextView below it to hold the post. Include a label next to it that says "Post:".
Add a Button below the TextView and change the text to say "Add". Your Storyboard should look like this:

We now have all the elements in our interface, but we need to connect them with code. Drag from each into the code:
You will see the function created for Add Post.
Add the code to the right to the designated places. In your ViewController declaration, add the Delegate and DataSource to control the UI TableView. Set up an array where you declare variables. For now, we will read messages from an array in the app, before we connect to the database. Include the delegate and datasource declarations in ViewDidLoad.
The class declaration will introduce errors that we will correct with the TableView functions in the next section.
TableView Functions
Add the two TableView functions to the ViewController to implement the Table View. The first one indicates the number of rows, based on the number of elements in postData. The second one reads the data from postData into PostCell. This should remove any errors.
You should be able to run the app and see the three messages from your array. Change the postData array and see it run with new data displayed. We are testing the app first with messages from an array in the app, so we can troubleshoot any problems before connecting to the database.
Read from Database
So that reads the messages from the array in the app, but we want to read them from the Firebase Database. Go back to Firebase and find your data. Click on Database and find your empty Cloud Firestore Database.
First we will add some data directly to the database, then read it. This is a simple database that will store subjects and posts, like a blogging system.
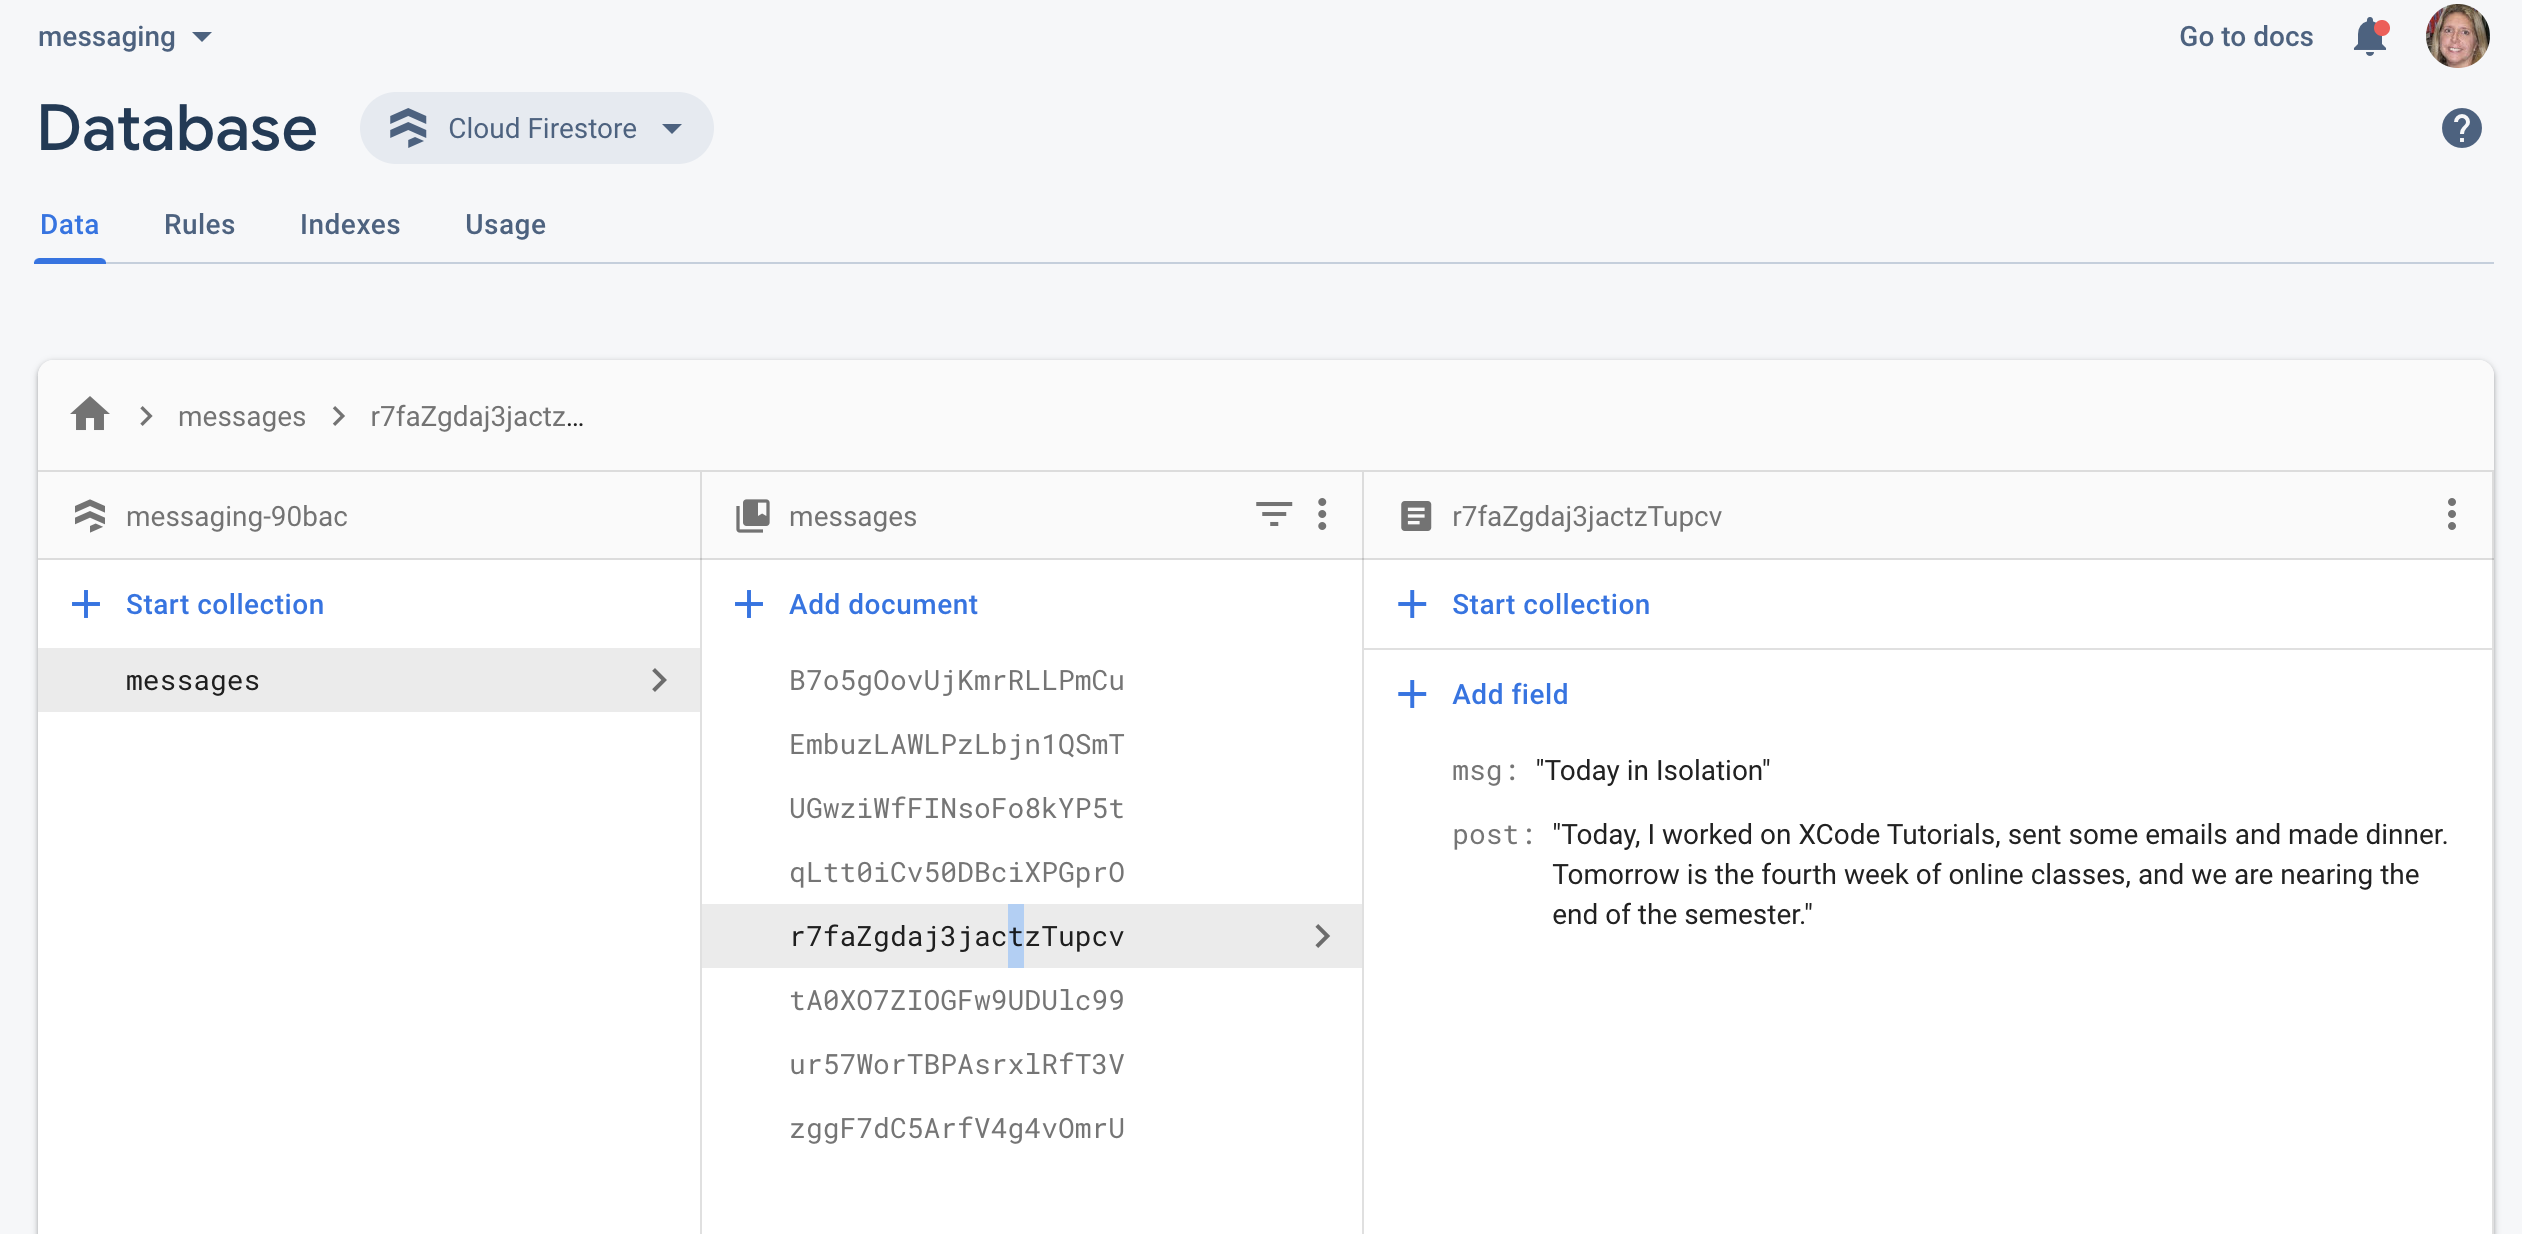
Start a Collection called "messages." Skip the ID, so you can get an Auto ID for each message. Add a field called "msg" and give it the value "Message 1". Add a second field call "post" and give it the content "This is my first post". Choose Save and add any additional Documents you want to the Collection to store additional "msg" and "post" fields. Your database should look like the image below when populated with several documents.
Include code in the appropriate area in the ViewController. This is similar to what we did in the previous exercise when we read headlines from the database. After you insert all the code, run the app and see if it is reading the data from the database instead of your array.
Write to the Database
Include the code in the addPost function. It writes a new item to the database and also resigns the keyboard on input. Test the app. You should be able to read and write data to your database below in the tableView.
Create a DetailViewController
The code above puts the subject into the textView in the initial ViewController, but we'd like to click on that item to go to a detailed page that provides both the subject and the post. To do that, refer to the previous tutorials for adding a new View Controller (Library, View Controller) and creating a swift file(File, New, File, Cocoa Touch class, name it DetailViewController, make sure it is subclass of: UIViewController) and attaching it to the Storyboard (select the ViewController icon in the new ViewController on the storyboard and use the Identity inspector to find it under Class).
Create a segue from the initial ViewController to the DetailViewController and name it "TheSegue" (drag from button in initial View Controller to the DetailViewController).
You will also need to add a Navigation Controller to the initial ViewController for a Back button (Editor, Embed in, Navigation Controller)
On the Storyboard in the DetailViewController, add two TextViews from the Library. Connect them to the code as Outlets in the DetailViewController.swift file, naming them "msg" and "post" respectively.
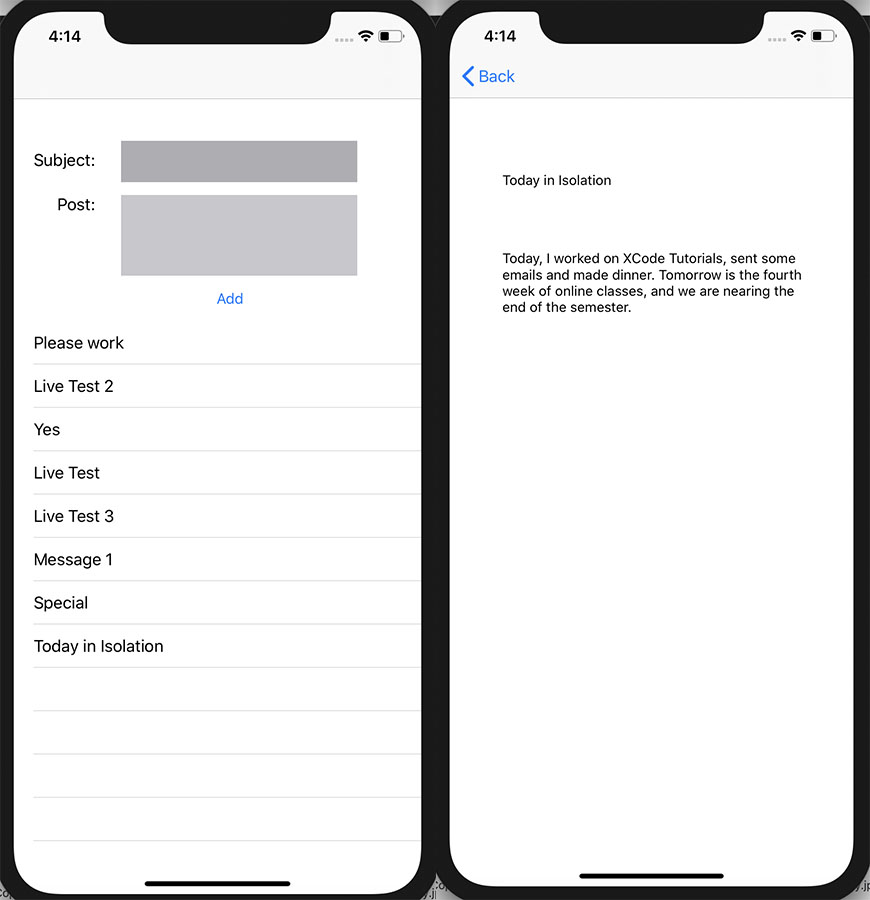
The completed app should look something like this when you run it.
Delete With Swipe
Sometimes you want the user to be able to delete a post they make. Include the code to the right in the appropriate areas to add a delete function. This allows you to swipe left on a TableView item to reveal a delete button. The code gets the "key" or the autoid assigned to each post and appends to an array. When a row is deleted from the TableView, the item at that index number is deleted from the arrays and the item in the database with the auto-id that corresponds to that number is also deleted.
Moving On
Great job! You used a variety of functions to make an interactive application using a cloud database. There are other functions a messaging app would include, but this gets you started with thinking about how you can make interactive applications. Consider how you will use these techniques in your own projects.