
iPhone App Development - Intro to SwiftUI
What is it?
Swift is the current language for creating iPhone applications. It works within Apple's Interactive Development Environment (IDE) XCode. It is a combination of visual and programming interfaces.
Why should I learn it?
The world is mobile. While many content applications can function on phone browsers, there are some applications, like games, social media and ecommerce, that need native functionality.
What can I do with it?
You can create the visual interface as well as add code to represent functionality of your application using Swift and XCode. Then you can test and upload to Apple's App Store.
How long will it take?
Learning application development is a different and bit more difficult than creating websites. These tutorials will take several weeks to go through to explain the basic functionality available for application development. But with time and practice, you can master the skills necessary to create functional applications. Beyond iPhone development, there is native Android development and cross-platform options like React Native to consider.
SwiftUI
In 2019, Apple introduced a new method of app development called SwiftUI. It is a more code-based approach with a graphical user interface within XCode that executes while you code. This is different from the Storyboard method in which you use a combination of Storyboard objects and code in ViewControllers, and then execute it in the Simulator. Both Storyboard and SwiftUI are available for App Developers, and many thousands of apps have been developed with Storyboard. But SwiftUI is the way that Apple expects developers to work in the future. We are going to first introduce some of the features we used in the first Storyboard tutorial, but now using the SwiftUI method.
Starting a SwiftUI Project
Start with a new iOS App project. (File, New, Project, iOS, App, make sure you choose Language: Swift & User Interface: SwiftUI). This is where we indicate the use of SwiftUI. Name the project "FirstSwiftUI". You don't need to include any sort of Tests or connection to GitHub for these projects.
When you come into the project, you will notice things look a bit different. We have a code window that is known as ContentView in the Project Navigator. And you have a screen that has a working Preview of your app. If you lose this screen, you can choose Editor, Canvas to get it to appear again. You can and should still use the Simulator buttons to test the app, but the Preview gives you a live view while you work.
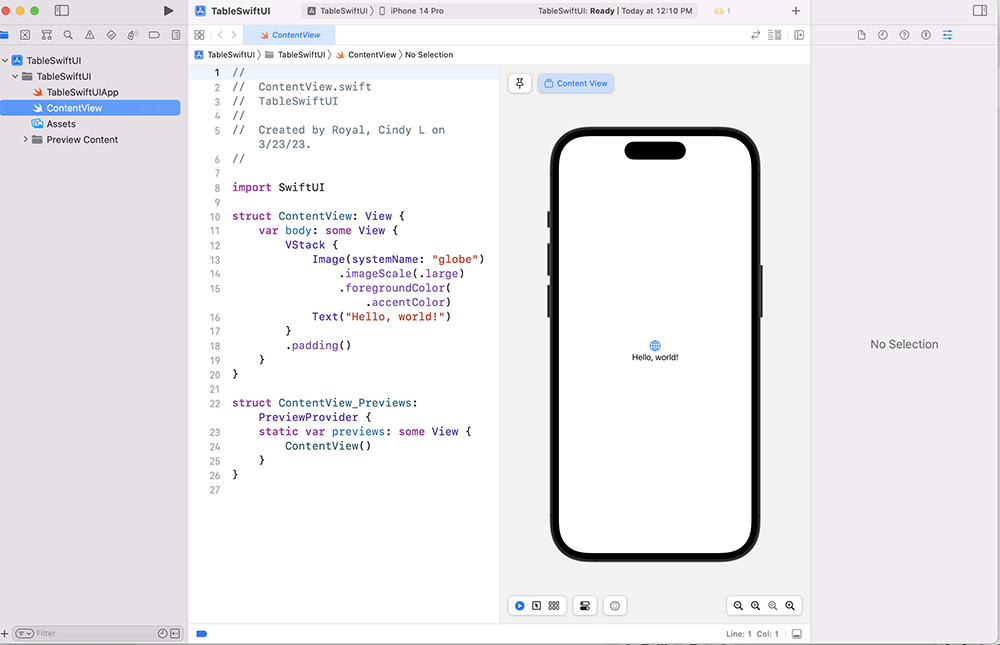
In the ContentView code, you will see a struct for the main View and one for the Preview. We will mostly be coding in the ContentView. You may need to refresh the Preview while you are coding to see the current interface.
You will notice a simple Hello World display when you view the initial code in the ContentView. That view includes a "var body: some View" that has a VStack (vertical stack) placement of the items. SwiftUI uses VStack and HStack (horizontal stack) commands for relative layout, and you will see those items as we do additional exercises. We will be coding within the "var body" of the view. The items with periods in from of them indicate the various modifiers (options) for the varous items of the interface, including textfields, text, buttons, switches, sliders, etc.
Our first example displays how a simple textfield and button would work to change an element on the screen. The texfield captures the value and puts it in the variable "name". There are a few options that style the textfield. It is put in a VStack to display the items vertically on the screen.
There is a button that when pressed reveals the greeting. Once that happens, the program will greet with the name from the textfield name in a simple text box. If the textfield is empty, it will say Hello, World. Font and padding options are included for the Text item. Play with padding by adding or changing the number in the padding element.
Include these items below the "import SwiftUI" statement in the ContentView. Be careful not to repeat items that are already in your code. Follow the instructions in the comments.
Adding a Switch
Next we will add a Switch to show and hide the greeting.Include the code below the padding line for the button, but above the if statement that shows the greeting text. Notice that this switch automatically turns on with the button press, but then continues to toggle the greeting. Also notice that if the greeting is in view, the text changes dynamically as the textfield changes.
Because the switch now toggles the greeting, you might consider removing the button.
Add code for Switch to toggle the greeting. Include below padding for the Button.
Adding a Slider
Now let's add a slider that controls the look of our greeting. First, add the variable for fontSize at the top of the ContentView with the other variables. Then add the code for the slider below the Switch code (below the padding option). Finally, modify the if statement to control the font size with the slider.
Add to top of ContentView where other variables are declared
Add Slider Code below Switch code and modify the if statement that shows the greeting.
Adding an Image
Finally, let's add an image to the top of our VStack. First, you must find an image (like the Welcome Image we used previously) and upload it to the Assets folder in the application. Then use the code to include the image. Notice that the code does not require the .jpg extension. You must include the .resizable modifier to allow the image to resize, if you want to use other modifiers for frame width and height and padding. The image will appear where it is placed in the View, but you can play with adding an image to different places in the code.
Stacks, Spacers and Padding
You will notice that all our content is contained in one VStack. That is a vertical stack that displays each content item vertically. Later, we will talk about the HStack that allows you to display items horizontally. You can include the spacing modifier in the VStack declaration that will consistently space each item within it.
We have used a couple additional ways to control spacing in this program. The Spacer() command is used to create space above or below a VStack. Placing the Spacer() code at the end of a VStack moves the content to the top of the screen. If you move the Spacer() code to the top of the VStack, it moves the content to the bottom of the screen. Consider the importance of this as it relates to different sized screens.
We also have used padding in a few ways. Using the .padding() modifier for an item provides default padding for both horizontal and vertical dimensions. You can specify .horizontal or .vertical and a number to indicate size to further control the padding. Include one line for each when controlling both horizontal and vertical padding. Play with each of these options to get a sense for how they modify the layout of your screen.
Add a Border
For fun, let's add a modifier for border to our code. Find an element, like the Text item in the if statement, and include the following at the end of the modifier stack:
.border(Color.gray, width: 4)
Modify the options to test in your app.
SwiftUI modifiers are added in the order in which they appear in the code, so be mindful of the order when you are testing your results.
Add to top VStack. Make sure image is uploaded to Assets.
Did You Get It All To Work?
The code sample includes the full code for the ContentView. If you have errors, check the code to see what you missed. Be careful with properly closing curly braces and other syntax issues. Remember to leave the #Preview intact, because that is what creates the Canvas that allows you to view the app while working.
Moving On
Great job! You have learned how to use SwiftUI to create to work with some basic elements and functionality. Next, we will apply SwiftUI to a more complex application.